
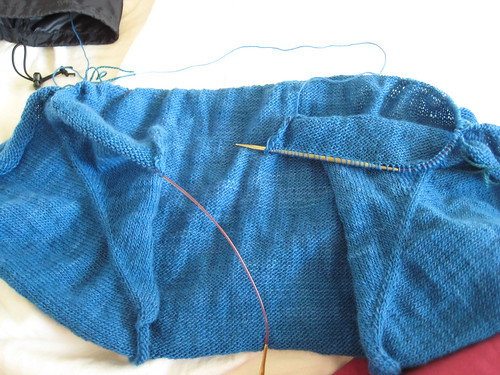
But how did I take the sleeves off, you ask? This picture shows what the knitting looked like after the last row of the increase section (ended with a WS row).
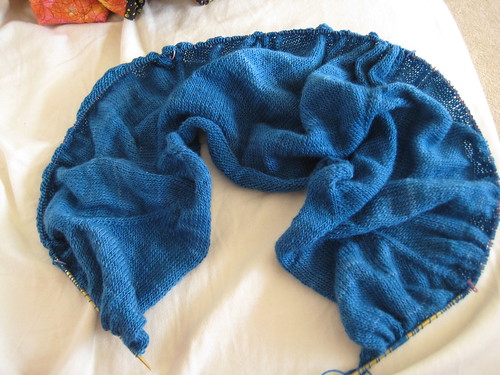
If you look hard, you can see my 4 stitch markers--lower right, upper right, upper left, lower left. Contained within each pair (right sided pair, left sided pair) are the stitches that will become each sleeve. And now I finally get to put these stitches on hold to knit just the body. So, you knit along what will become the left front of the sweater until you get to the first stitch maker:
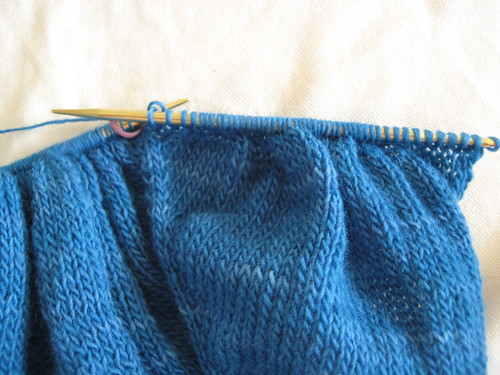
Remove the maker, then take a darning needle and some random yarn and thread the yarn through the stitches that were after the 1st stitch maker. Thread all the stitches on to the yarn until you get to the second stitch marker:

It would have been more illustrative if I'd chosen random scrap yarn that wasn't nearly the same color as my working yarn, but this stuff was right next to me, and you know, laziness wins. So you see all those stitches inbetween the 2 needle points--those are the stitches that will become the left sleeve, but for a while, they're going to chill on that piece of yarn. I like to tie the 2 ends of the scrap yarn into a little knot, just to be extra sure those sleeve stitches stay put (yeah, learned to do this after an unfortunate event). Now it's time to join the left front (stuff in the far right of the above picture) with the stitches that belong to the back (stuff in the far left of the above picture). The pattern calls for casting on 2 underarm stitches before knitting the stitches that belong to the back. To do this, I use the backward thumb method (does this have a more official name? I don't know), basically you make a little loop of yarn around your left thumb and slide it into the needle in your right hand:
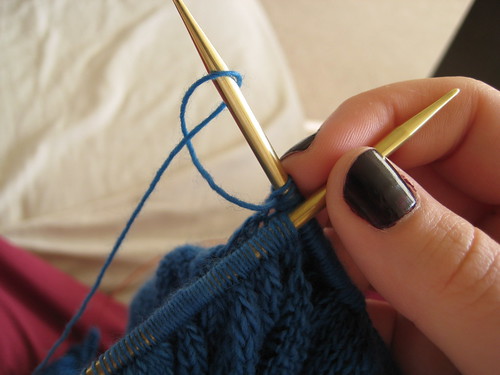
(You like that nail polish? It's super dark raisin-y purple, almost black. Makes me very happy.) Pull this loop nice and tight, then knit the stitches that belong to the back (they used to be after the 2nd stitch marker). Repeat the above steps to put the stitches between the 3rd and 4th stitch makers on another piece of waste yarn, then knit the stitches that will become the right front. This is what it should look like:
The future left sleeve is exiting the frame on the left, and the future right sleeve is exiting the frame on the right. Now the pattern says to knit the body plain for 10 inches or until desired length. So it might be a while before I have more to say about this project. But I must say, being able to separate the sleeves made me feel like I'm making real progress with this--kind of renewed my knitting mojo with this project. Now I'm going to go try on what I have so far (one of the good things about knitting top down reglans)--I want to make sure I have a good number of stitches for the sleeves before I do a ton of knitting on the body then hate it and have to frog a whole bunch. I plan on being able to wear this to Tracie's graduation on 6/9--so I can't lose my mojo again.
1 comment:
Hi Robin, I have to thank you for this post, and I see I will be thanking you for part 5 and 6 of featherweight cardigan. I completely misunderstood the pattern instructions and have spent all my free time of today trying to find out how to do this...and then I found you!
THANKS!
Post a Comment