Sunday, May 31, 2009

My cat, the terrorist

Butters the terrorist

Butters has been making trouble while I've been sleeping. A couple of days ago, while picking up stitches on the blue cardi, I find a snag in the cord of my beloved addi turbo lace needle!
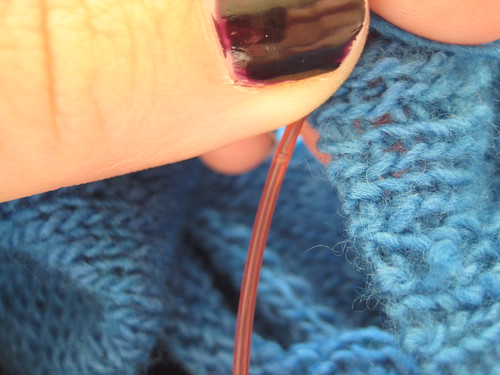
The cat bit my needle!!!

I know it's hard to see, but it's there, just below my thumb. The little turd bit into my needle!! So there was a little snaggy bit on 2 sides of the cord. Grrrr! I would have liked to use super fine grade sand paper to file it down, but I didn't have, so I used my nail file, which worked pretty well.

cat bite--post filing

It looks rough, but it's smooth enough now that my knitting passes over it without event. I learned a lesson: all knitting needles securely stowed away when Butters is left unsupervised.

The day after the needle incident, I go to open the blind in the front room and the cord breaks as soon as I pull it.
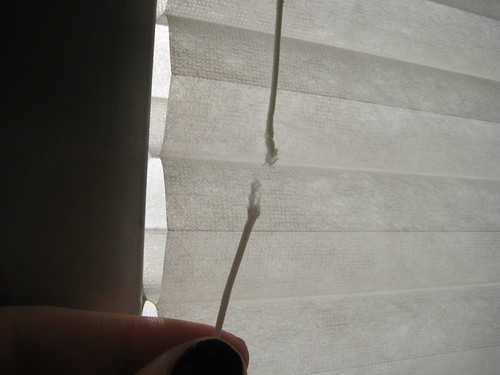
Butters chewed the blind cord

Somehow, he managed to chew it so that there was just one little filament holding it together, which gave out as soon as pressure was applied. I don't really know how he even reached the part that broke. It's pretty high above the window ledge. Grrr. So I tied it in a knot and now it looks super ghetto. The next discovery of terrorism happened a moment later:
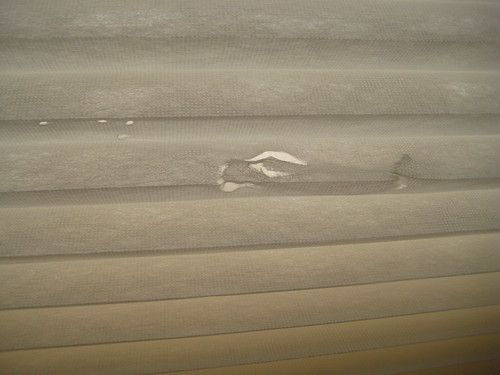
Butters attacked the blinds

Appears he attacked my lovely honeycomb blinds. Why, Butters, why??? I tried to keep in him in my bedroom over night last night, but he was making too much noise at the door, so I let him out. No terrorism discovered today...yet.

Let's make something! Part 6--the collar

I decided to knit the collar before the sleeves for this blue cardi. My reasons for doing this were fairly arbitrary, but if you're worried about running out of yarn (I'm not, but still), I would recommend doing this, that way you can use half of whatever remains for sleeve 1 and the other half for sleeve 2. The pattern instructs you to pick up 2 stitches for every 3 rows of knitting on the fronts, and 1 for 1 along the cast on edge at the top of the work.

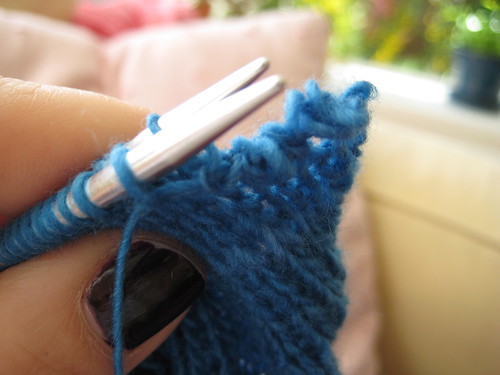
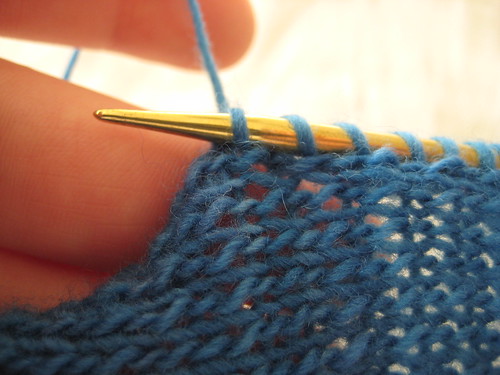
Picking up stitches

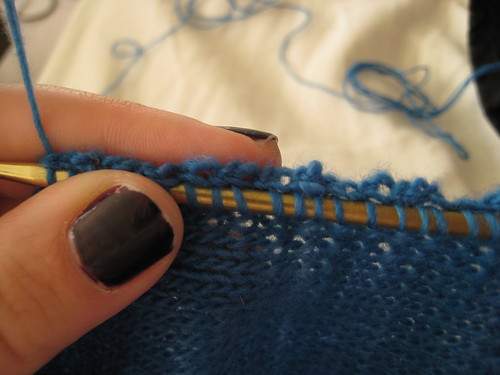
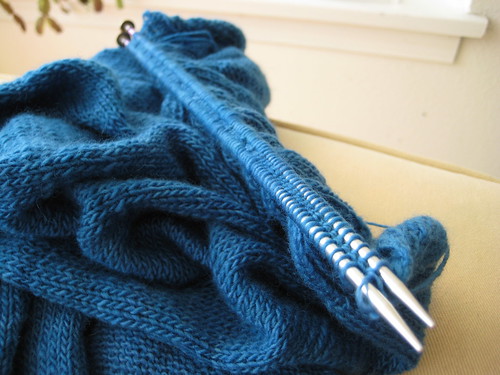
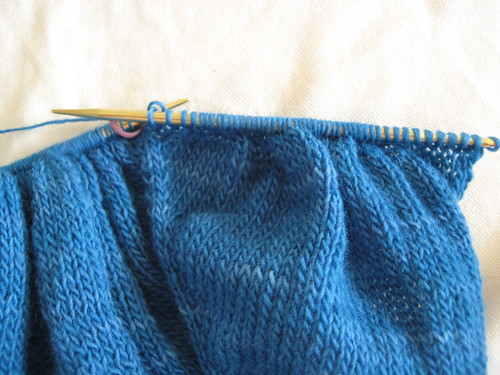
I picked up the stitches, starting at the bottom of the right front, with the right side facing. I pick up my stitches between the edgemost stitch and the second edgemost stitch of the work, so that once the stitches have been picked up along the front, there's an entire column of (messy) edge stitches behind the row of picked up stitches

Row of picked up stitches

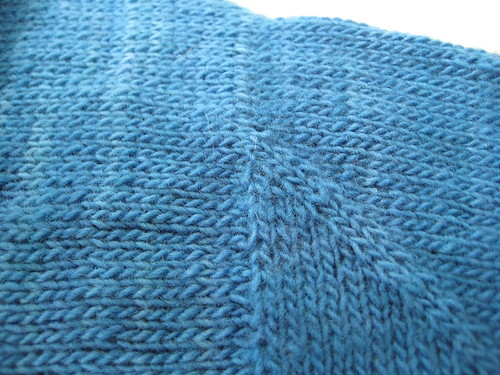
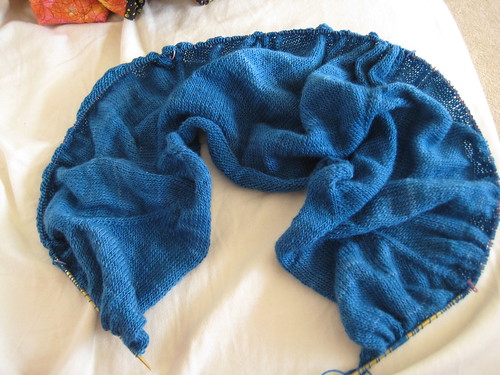
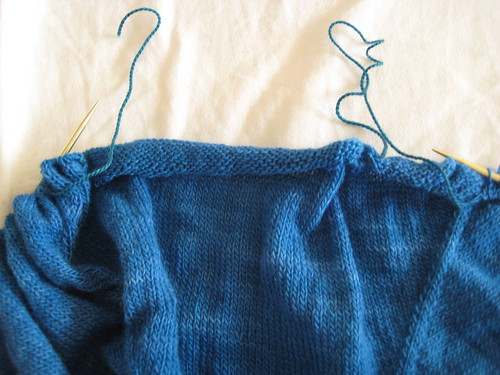
The way the stitches are picked up along the cast on edge, the collar appears to be continuous with the back of the sweater, which I like. This shows the collar along left front and sleeve:

IMG_2020

Once you've picked up stitches ALL THE WAY around (this might take a while), you work back in forth in stockinette until desired width. I decided I wanted my collar to be about 4". I pondered how best to cast off quite a bit, and considered working a super small hemmed edge, but after a test swatch, decided against this method. In the end, I used a loose knitted cast off, worked on the wrong side but in knit stitches. I liked this better than the look of the knitted cast off worked on the right side.

Collar cast off

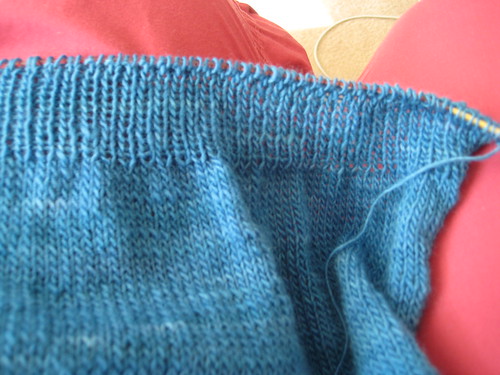
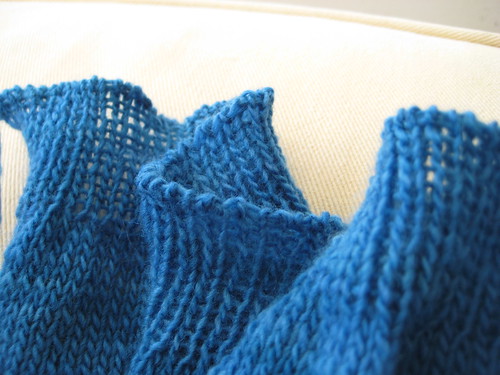
Whatever cast off you choose, make sure it is super stretchy. It would suck to have a tight cast off on such a light an airy sweater. The collar is SUPER rolly, which is a little annoying, but I'll get over it. That's why I decided to go for 4", to compensate a bit for the mad rolling.

Collar

Next up, the sleeves!

Friday, May 29, 2009

What the ....???

In case you haven't seen this yet, let me share it with you now. Read the review section. It's hilarious and bizarre, I promise you.

Wednesday, May 27, 2009

Let's make something! Part 5--finishing the body

The knitting of the body of the featherweight cardi went surprisingly fast. It's all stockinette, but it still surprised me by the quickness. Yesterday morning I was half done, and last night--poof!--it was all done! I knit a full 10" of stockinette, as directed by the pattern, though I considered stopping at 9.5". If you're of shorter stature, you might want to do less than 10" of stockinette.

For the edge of the body, the pattern calls for 1x1 rib. I'm not always pleased with how my 1x1 rib looks, so I considered doing seed stitch for the edge, but in the end decided to give the ribbing a chance. And I like how it looks. The pattern recommends 2", but I stopped at 1.25". I didn't want a full 2" of ribbing at the bottom, but I wanted enough so that the bottom of the sweater doesn't curl up. Something else I considered was a folded hem, but in the end decided this might counteract the lightness of this sweater.

1x1 ribbin

To cast off the 1x1 ribbing, I used what knittinghelp.com calls, the Knit-One-Purl-One Bind Off. Basically, you use kitchener stitch to graft the stitches together, as though the knit stitches were one piece and the purl stitches were another (like how you graft the toe of a sock). I find it easier to complete this bind off with the knits and purls on separate needles (though this is not necessary):

Ready to cast off body

For the sewing, it's important to have lots of yarn--3x the width of your knitting (or more). Many times I've run out of yarn, then have to join in a new piece, and this is just annoying. So more is better. Plus, I want this cast off to be nice and stretchy, so I don't want to worry at all about yarn budgeting. While working this cast off, I like to keep it super loose. It looks messy, but it's easy to go through and clean/tighten things up a bit when it's done (or every few inches for a project with this many stitches).

Casting off

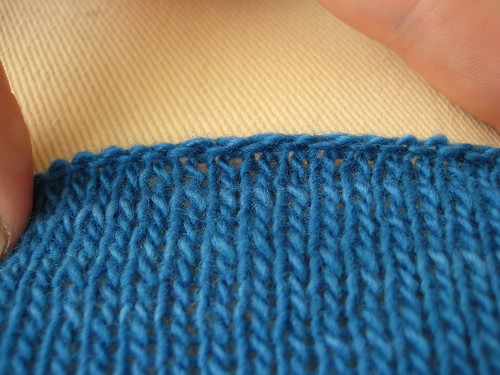
The thing about this cast-off method: it takes FOREVER. The new Phoenix album and an entire episode of This American Life (#381 Turncoat). But I'm pleased with the result. It's nice and stretchy but still neat-looking. This cast off creates the same look you would get with a tubular cast-on if you worked the sweater from the bottom up.

Cast off edge

I was super congested this morning (thanks, allergies) so I took some Sudafed, which is a wonder. But now I'm left with that jittery feeling, like I had too much caffeine, plus a weird foggy head. It's not pleasant.

Saturday, May 23, 2009

Avec toi, cheri, la vie est belle

I haven't talked about music for a while. I'm listening to so much great stuff right now that it would take too long to discuss it all, so let me just touch on one CD that I can't get enough of:


Amadou & Mariam's new one, Welcome to Mali. This duo met in a school for the blind. Their music is mostly in French, has a great world beat sound. I just LOVE this CD. I've listened to it at least twice per day since I got it on Tuesday. My favorite song, and the reason I was compelled to buy it, is the first track, Sabali. It starts out sounding like an old French song, something from the era of Edith Piaf or something, except the words she's singing at this point aren't actually French, then a synthy beat picks up, and a refrain of "Sabali, sabali, sabali" and some other African words. It isn't until more than 1:30 in that the French lyrics that I can understand start. They go:

Cheri je m'addresse a toi (Dear, I'm talking to you)
Avec toi cheri la vie est belle (With you, dear, life is beautiful)

Avec toi cheri (with you, dear)
C'est si bon, la vie (it's so beautiful, life)

Cheri je te fais un gros bisou (dear, I give you a huge kiss)
Je t'embrasse fort (I "hug" you firmly)

And there's lots of lalalalalas and ooo ooo ooos. It's just great.

The weather this weekend is GORGEOUS. I'm going to go listen to this outside now.

Let's make something! Part 4--dividing for the sleeves

Thanks mostly to the bus ride to and from the game, I managed to finish all the increase rows last night. Woo hoo! I was afraid this day would never come. Toward the end of the increase section, it was taking me 20 min/row--that's 20 focused minutes. Not gabbing with Tracie while sort of watching baseball (which would explain why I only finished 4 rows during the game). Now that I've taken the sleeves off, I'm knitting roughly 200 fewer stitches per row, so things should go a bit quicker.

But how did I take the sleeves off, you ask? This picture shows what the knitting looked like after the last row of the increase section (ended with a WS row).

end of increase section

If you look hard, you can see my 4 stitch markers--lower right, upper right, upper left, lower left. Contained within each pair (right sided pair, left sided pair) are the stitches that will become each sleeve. And now I finally get to put these stitches on hold to knit just the body. So, you knit along what will become the left front of the sweater until you get to the first stitch maker:

right front

Remove the maker, then take a darning needle and some random yarn and thread the yarn through the stitches that were after the 1st stitch maker. Thread all the stitches on to the yarn until you get to the second stitch marker:

sleeve stitches on hold

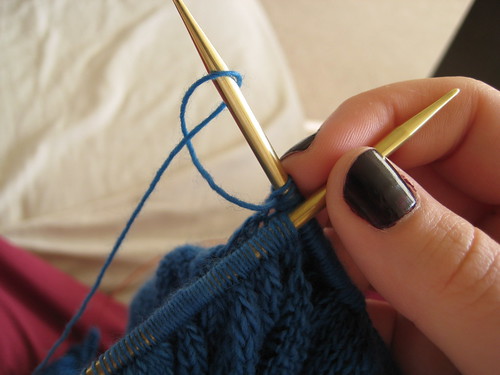
It would have been more illustrative if I'd chosen random scrap yarn that wasn't nearly the same color as my working yarn, but this stuff was right next to me, and you know, laziness wins. So you see all those stitches inbetween the 2 needle points--those are the stitches that will become the left sleeve, but for a while, they're going to chill on that piece of yarn. I like to tie the 2 ends of the scrap yarn into a little knot, just to be extra sure those sleeve stitches stay put (yeah, learned to do this after an unfortunate event). Now it's time to join the left front (stuff in the far right of the above picture) with the stitches that belong to the back (stuff in the far left of the above picture). The pattern calls for casting on 2 underarm stitches before knitting the stitches that belong to the back. To do this, I use the backward thumb method (does this have a more official name? I don't know), basically you make a little loop of yarn around your left thumb and slide it into the needle in your right hand:

thumb loop cast on

(You like that nail polish? It's super dark raisin-y purple, almost black. Makes me very happy.) Pull this loop nice and tight, then knit the stitches that belong to the back (they used to be after the 2nd stitch marker). Repeat the above steps to put the stitches between the 3rd and 4th stitch makers on another piece of waste yarn, then knit the stitches that will become the right front. This is what it should look like:

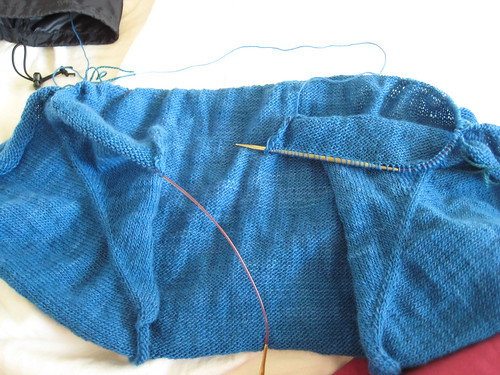
both sleeves removed

The future left sleeve is exiting the frame on the left, and the future right sleeve is exiting the frame on the right. Now the pattern says to knit the body plain for 10 inches or until desired length. So it might be a while before I have more to say about this project. But I must say, being able to separate the sleeves made me feel like I'm making real progress with this--kind of renewed my knitting mojo with this project. Now I'm going to go try on what I have so far (one of the good things about knitting top down reglans)--I want to make sure I have a good number of stitches for the sleeves before I do a ton of knitting on the body then hate it and have to frog a whole bunch. I plan on being able to wear this to Tracie's graduation on 6/9--so I can't lose my mojo again.

Friday, May 22, 2009

The cheating continues

I've knit on the blue cardi for a couple of hours since the last pics, but the change would be noticeable (is that really how you spell that???) to no one, so let's not dwell on that. I would have done more, but instead...

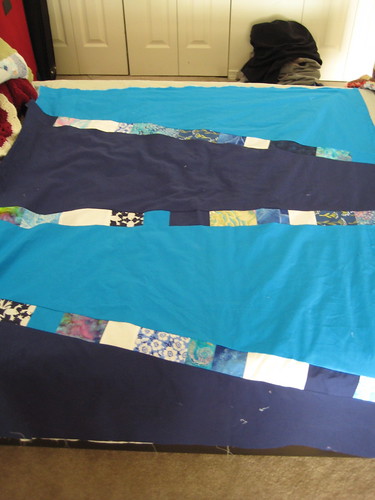
Sea Blue Sea quilt back

I pieced the backing to go with that quilt top. I wanted the back to be interesting, but not more so than the front, and I this about does it.

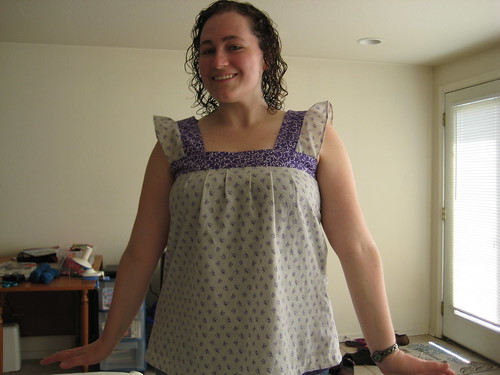
Spring Ruffle Top

And I made this summery top, per this tutorial on Sew Mama Sew. Of course, I made the mistake of choosing fabric that is not quite opaque. I think I'm going to tinker a bit more with the fit--the straps need to lose 1/2 inch in length, and I might size in the body a bit more. I might also unstitch the pleats in the front (the back has 2" pleats, the front has 1" pleats)--in this pic it looks like I have a unaboob.

Tonight I'm going to the Mariners game, known around these parts as 3 solid hours of knitting time. So maybe I'll be ready to divide for the sleeves tomorrow.

I made a super yummy enchilada lassagne casserole thingy a couple nights ago. I intended to make enchiladas, but at the last minute, decided to instead do a lassagne-like thing.

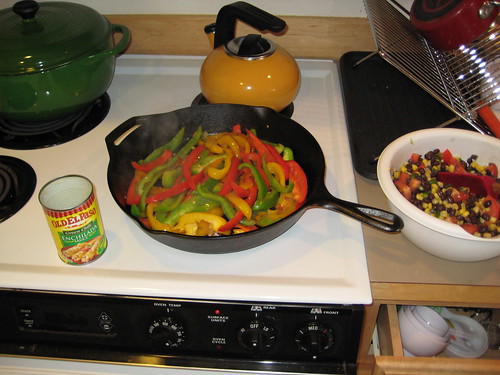
Enchilada lassagne ingredients

Wow, I just realized while previewing this post that the color coordination in that there photo is something to marvel at! Green dutch oven, yellow tea kettle, red sauce pan; green pepper, yellow pepper, red pepper; Old El Paso can; green serano chilis, yellow corn, red tomato. I wish I could say that I planned that. Anyways... Ingredients: red, green and yellow bell pepper, sauteed until soft; canned green enchilada sauce; ~1 cup dry black beans, soaked over night then cooked 45 min; 1 serano chili (btw: I have become a PRO at cutting chilis without actually touching them with my fingers--it's all about the creative use of a fork, spoon and sharp knife); canned corn kernels; 2 diced roma tomatoes; corn tortillas; a little mozzarella and a little cheddar; crumbs from the bottom of my bag of blue corn tortilla chips for a little crunch on top (optional)

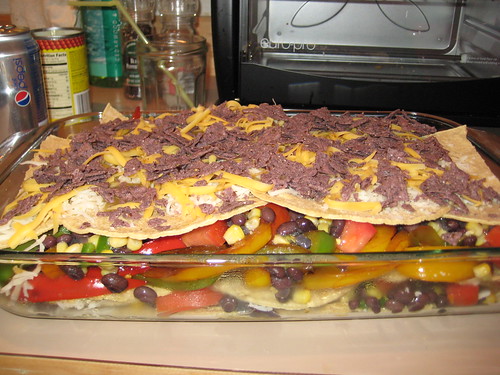
Enchilada lassagne

The result? Crazy delicious!

Oh, and in case you haven't had your daily fill of cute, I present my kitty: